Automate Website Screenshots for Visual Regression Testing
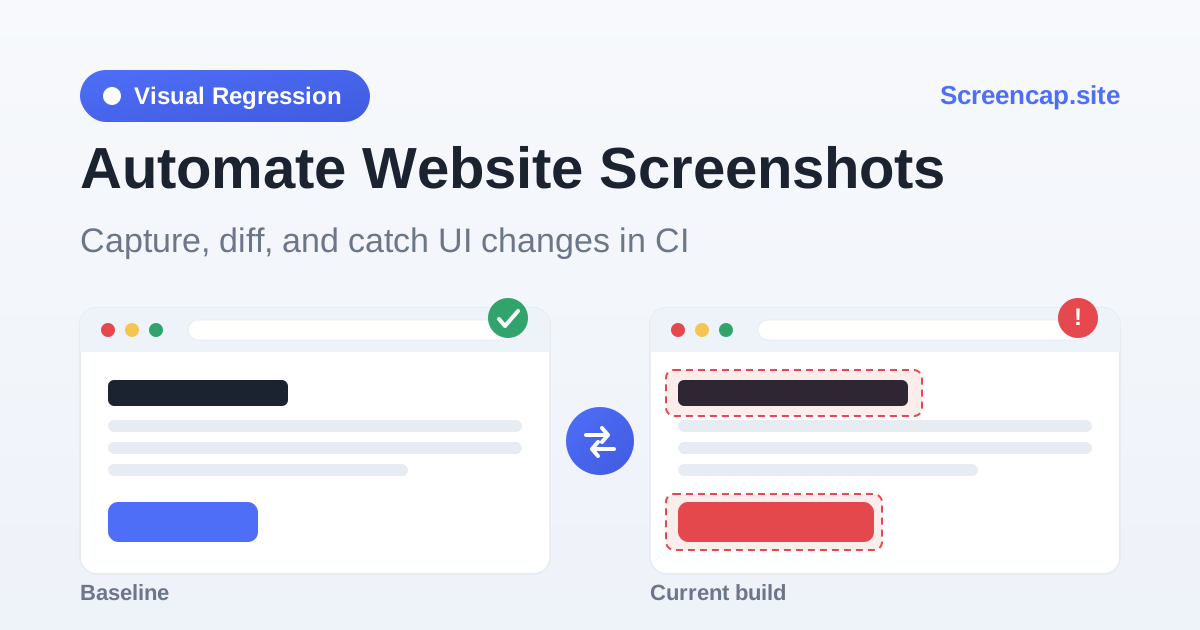
Unit tests tell you your functions still return the right values, but they say nothing about whether your interface still looks right. A stray CSS change, a bumped dependency, or a refactored component can silently shift a layout, hide a button, or break a font, and no assertion catches it. Visual regression testing closes that gap: it captures a screenshot of a page, compares it pixel-for-pixel against a known- good baseline, and flags anything that changed. In this guide you'll automate website screenshots with a screenshot API, diff them, and wire the whole thing into your CI so unintended UI changes fail the build instead of reaching production.
What is visual regression testing?
Visual regression testing is the practice of detecting unintended visual changes in a user interface by comparing images of it over time. You take a screenshot when the UI looks correct (the baseline) and store it. On every subsequent run you capture the same page again, overlay the two images, and count the pixels that differ. If the difference exceeds a threshold you decide, the run fails and you review a highlighted diff to decide whether the change was intended (update the baseline) or a bug (fix the code).
The technique is deliberately dumb, and that is its strength. It doesn't need to understand your components or your design system; it only needs two images and a way to compare them. That makes it a perfect safety net for the whole-page and cross-browser concerns that are painful to cover with assertion-based tests: spacing, z-index, web-font loading, responsive breakpoints, dark-mode variants, and third-party embeds.
Why automate screenshots with an API
You can generate screenshots yourself by driving headless Chrome with Puppeteer or Playwright. It works, but running browsers is where visual testing quietly becomes a maintenance project. You end up pinning browser versions, installing system libraries in CI, allocating enough memory so Chrome doesn't crash mid-render, and debugging why the same page renders one pixel differently on your Mac and on the Linux runner. Those sub-pixel, platform-dependent differences are the number-one source of flaky visual tests.
A hosted screenshot API removes that entire layer. You send one authenticated HTTP request and get back an image rendered on consistent, managed infrastructure, the same environment every time, with no browser to install and no runner to keep warm. Your CI job shrinks to a plain HTTP call, renders stay deterministic across machines, and you scale to hundreds of pages without provisioning anything. The Screencap.site API is exactly this: a single GET /api/capture endpoint that returns the raw image bytes.
Step 1: Capture a baseline screenshot
First, create a free account and generate an API key from your dashboard; it starts with sk_live_ and is shown in full only once. Then capture your first baseline. Every capture is one request to GET https://screencap.site/api/capture with your target url and, optionally, a width/w and height/h. The response body is the image. From the command line:
curl -H "Authorization: Bearer sk_live_YOUR_KEY" \
  "https://screencap.site/api/capture?url=https%3A%2F%2Fexample.com&w=1280&h=720" \
  --output baseline.jpg
The image comes back in the format the renderer produces, named in the response's Content-Type header (JPEG today), so read that header rather than assuming an extension. The same request from Node, writing the baseline to disk so you can commit it alongside your tests:
// capture.js: save a baseline screenshot to disk (Node 18+)
import { writeFile } from "node:fs/promises";

const target = "https://example.com";
const url =
  "https://screencap.site/api/capture" +
  "?url=" + encodeURIComponent(target) +
  "&w=1280&h=720";

const res = await fetch(url, {
  headers: { Authorization: "Bearer sk_live_YOUR_KEY" },
});
if (!res.ok) throw new Error("Capture failed: " + res.status);

// The Content-Type header says which image format came back.
const ext = (res.headers.get("content-type") || "").includes("png") ? "png" : "jpg";
const bytes = Buffer.from(await res.arrayBuffer());
await writeFile("baseline." + ext, bytes);
console.log("Saved baseline." + ext + " (" + bytes.length + " bytes)");
Commit the baseline to your repository (or store it as a CI artifact). It is the reference every future run compares against. The full list of parameters and error codes lives in the API reference.
Step 2: Diff against the baseline
With a baseline saved, comparison is a pure-Node step: capture the page again, decode both PNGs, and run them through pixelmatch. It reports how many pixels differ, so you can turn that into a ratio and fail above a threshold. Install the two dependencies:
npm i pixelmatch pngjs jpeg-jspngjs decodes and encodes the PNG buffers; pixelmatch does the comparison and writes a visual diff highlighting changed pixels in red. Here is a complete diff.js:
// diff.js: compare a fresh capture against the baseline
import { readFile, writeFile } from "node:fs/promises";
import { PNG } from "pngjs";
import jpeg from "jpeg-js";
import pixelmatch from "pixelmatch";

// Decode PNG or JPEG bytes into raw RGBA pixels that pixelmatch can compare.
function decode(bytes) {
  const isPng = bytes[0] === 0x89 && bytes[1] === 0x50; // PNG signature
  return isPng ? PNG.sync.read(bytes) : jpeg.decode(bytes, { useTArray: true, formatAsRGBA: true });
}

// A tiny helper that captures a URL and returns its decoded pixels.
async function capture(target) {
  const url =
    "https://screencap.site/api/capture" +
    "?url=" + encodeURIComponent(target) +
    "&w=1280&h=720";
  const res = await fetch(url, {
    headers: { Authorization: "Bearer " + process.env.SCREENCAP_KEY },
  });
  if (!res.ok) throw new Error("Capture failed: " + res.status);
  return decode(Buffer.from(await res.arrayBuffer()));
}

const baseline = decode(await readFile("baseline.jpg"));
const current = await capture("https://example.com");

const { width, height } = baseline;
const diff = new PNG({ width, height });

// pixelmatch returns the number of pixels that differ.
const mismatched = pixelmatch(
  baseline.data,
  current.data,
  diff.data,
  width,
  height,
  { threshold: 0.1 }, // 0 = strict, 1 = lax; 0.1 tolerates anti-aliasing
);

const ratio = mismatched / (width * height);
await writeFile("diff.png", PNG.sync.write(diff));
console.log("Mismatched pixels: " + mismatched + " (" + (ratio * 100).toFixed(3) + "%)");

// Fail the process if more than 0.1% of pixels changed.
if (ratio > 0.001) {
  console.error("Visual regression detected, see diff.png");
  process.exit(1);
}
The threshold option (0 to 1) controls how different two pixels must be before they count as changed; a small value like 0.1 forgives anti-aliasing without missing real changes. The ratio, mismatched pixels over total pixels, is what you assert on, because it's resolution-independent and easy to reason about. When it exceeds your budget the script exits non-zero and saves diff.png so you can see exactly what moved.
Step 3: Run it in CI
Because both steps are ordinary HTTP-and-Node, they drop straight into any CI system with no browser dependencies to install. Store your key as an encrypted secret (never commit it) and run the diff on every pull request. A minimal GitHub Actions workflow:
# .github/workflows/visual-regression.yml
name: Visual regression
on: [pull_request]

jobs:
  screenshot-diff:
    runs-on: ubuntu-latest
    steps:
      - uses: actions/checkout@v4
      - uses: actions/setup-node@v4
        with:
          node-version: 20
      - run: npm ci
      # baseline.jpg is committed to the repo (or restored from a cache/artifact)
      - name: Diff against baseline
        env:
          SCREENCAP_KEY: ${{ secrets.SCREENCAP_KEY }}
        run: node diff.js
      - name: Upload diff on failure
        if: failure()
        uses: actions/upload-artifact@v4
        with:
          name: visual-diff
          path: diff.png
Now any change that alters the rendered page fails the check, and the highlighted diff.png is uploaded as an artifact for review. If the change was intentional, regenerate and commit a fresh baseline; if not, you caught a visual regression before it shipped.
Skip the plumbing: hosted visual monitoring
Sometimes you want the safety net without owning any of the code; for a marketing site, a landing page, or a competitor's pricing page you simply want to watch. Screencap.site includes built-in Visual Change Monitoring for exactly that. From your dashboard you point it at a URL and a schedule; it captures the page automatically, diffs each new capture against the previous one with the same pixelmatch engine, and alerts you when the page changes. It's the no-code alternative to the pipeline above: no baseline to commit, no CI job to maintain, no browsers to run.
Keep your baselines tamper-evident
Screenshots aren't only test fixtures; teams increasingly archive them as visual evidence: proof a disclosure was displayed, a consent banner was shown, or a price was live on a given date. When a screenshot is a compliance record, you need to prove it hasn't been altered since capture. Pair each archived image with a tamper-evident seal: a sibling tool, XSeal, seals any file with a timestamped cryptographic hash, so you can later demonstrate exactly which bytes existed and when. It's a small habit that turns a screenshot into defensible evidence.
Best practices for stable visual tests
The difference between a trusted visual suite and a flaky one that everyone ignores comes down to controlling non-determinism. A few rules that pay off:
- Mask dynamic regions. Timestamps, ad slots, carousels, avatars and live counters will differ on every run. Exclude those areas from the comparison (crop them out, or ignore their bounding box) so only meaningful changes fail the test.
- Pin a stable viewport. Always capture at the same
widthandheight(a fixed1280×720, say) so a differently sized render never masquerades as a regression. Use separate baselines per breakpoint you care about. - Allow for compression noise. JPEG captures carry small compression differences between runs, so keep a non-zero
thresholdand a small pixel budget rather than demanding an exact match. - Tune the threshold deliberately. Start strict, then raise
thresholdand your pixel-ratio budget just enough to absorb anti-aliasing noise. Too loose and you miss real bugs; too tight and the suite cries wolf. - Wait for the page to settle. Ensure fonts, images and animations have finished before capturing, so a mid-load frame doesn't create a phantom diff.
Wrapping up
Visual regression testing is one of the highest-leverage tests you can add: a handful of screenshots protect the parts of your UI that assertions never reach. By automating the captures with an API you skip the hardest part, running and maintaining browsers, and keep every render deterministic across machines. Capture a baseline, diff with pixelmatch, and fail CI on regressions, or lean on hosted Visual Change Monitoring for a zero-maintenance version.
Get a free API key and start capturing, or see the pricing plans and the full API documentation to go deeper.